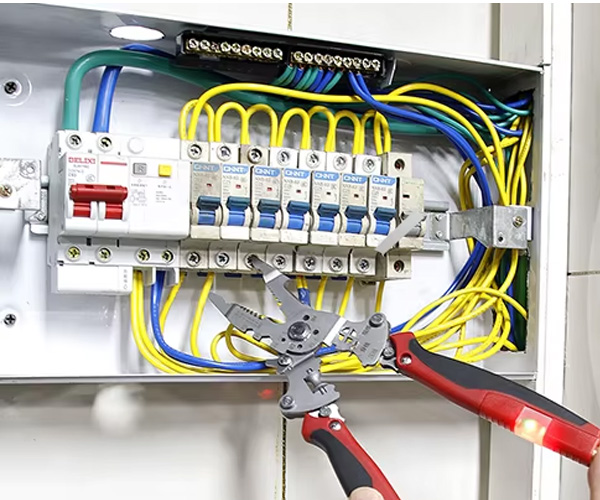
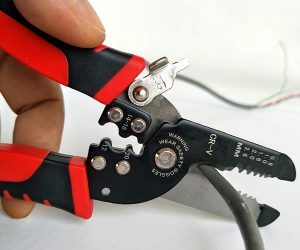
When it comes to handling electrical wiring, one essential tool you’ll need is a wire stripper. It may seem like a simple tool, but using a wire stripper properly is crucial for achieving clean, precise cuts without damaging the wire. In this article, we will guide you through the process of using a wire stripper effectively. Whether you’re a beginner or just looking to refresh your skills, this simple guide will help you get the job done right. Let’s break it down step by step!
1. What is a Wire Stripper and Why Do You Need One?
A wire stripper is a hand tool that removes the insulation from wires, allowing you to make connections or splices. Without a wire stripper, you might end up using inappropriate tools like knives or scissors, which can easily damage the wire. This is where a wire stripper comes in. The tool is designed to make the process easy, safe, and precise. But here’s the kicker: using the wrong wire stripper or improper techniques can still lead to issues like damaged wires, which can be dangerous, especially in electrical work.
Wire strippers come in many shapes and sizes, but the most common types are manual and automatic models. Manual wire strippers require you to apply force to strip the wire, while automatic models do this for you, often with a spring-loaded mechanism. The key to using any wire stripper is making sure the tool matches the wire size you’re working with. The insulation should come off cleanly without any damage to the conductor inside. This is why selecting the right tool for the job is essential.
Table: Types of Wire Strippers
| Type | Features | Pros | Cons |
|---|---|---|---|
| Manual Wire Stripper | Requires manual force to strip wires | Affordable, precise | Requires more effort |
| Automatic Wire Stripper | Spring-loaded, auto-stripping action | Faster, reduces hand fatigue | More expensive |
| Adjustable Wire Stripper | Adjustable for different wire sizes | Versatile | May require more skill to use |
2. How Does a Wire Stripper Work?
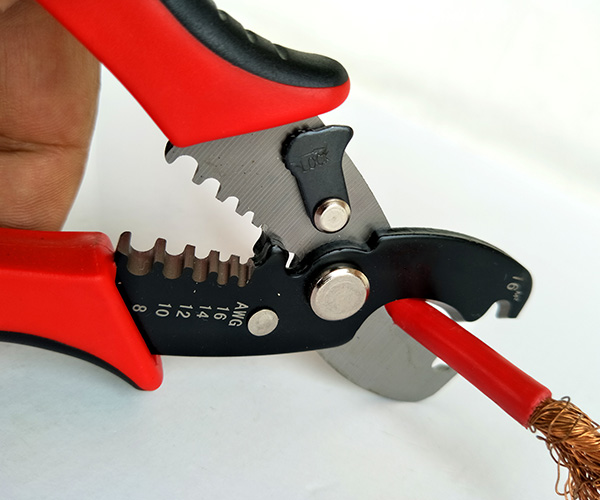
Wire strippers work by utilizing a sharp blade or blades that are specifically designed to cut through the wire’s insulation without damaging the metal wire inside. You place the wire in the stripper, adjust the tool to the appropriate gauge setting, and squeeze. The sharp blades cut through the insulation, while the adjustable gauge prevents the wire from being cut. Ready for the good part? With the right setting, all you need to do is pull the stripper off, and the insulation will come away cleanly.
The process starts by selecting the right gauge setting on the wire stripper. This is essential because different wires have different thicknesses of insulation. If the setting is too large or too small, it might either fail to strip the wire or damage the wire itself. Once the wire is inserted into the tool, you simply squeeze the handles to cut the insulation, and it’s done!
Table: Common Gauge Settings for Wire Strippers
| Gauge (AWG) | Recommended Setting |
|---|---|
| 18-20 | Low setting |
| 14-16 | Medium setting |
| 10-12 | High setting |
3. What Types of Wire Strippers Are Available?
There are several types of wire strippers available on the market, each designed for different tasks. Manual wire strippers, automatic wire strippers, and adjustable wire strippers are the most common options. So, what’s the real story? Each type of stripper offers distinct advantages and limitations, which makes choosing the right one crucial for your specific needs.
Manual wire strippers are affordable and ideal for small, precise tasks. They’re a great choice if you’re working with just a few wires or need a tool that you can control more easily. Automatic wire strippers, on the other hand, are perfect for larger projects where speed and efficiency are critical. They allow you to strip multiple wires quickly with minimal effort. Adjustable wire strippers are versatile tools that allow you to strip wires of various gauges, making them an excellent option if you work with a wide range of wire sizes.
Table: Comparison of Wire Stripper Types
| Type | Ideal For | Features | Price |
|---|---|---|---|
| Manual Wire Strippers | Small projects, precision work | Requires manual force, accurate cuts | Low |
| Automatic Wire Strippers | Large projects, efficiency | Auto-stripping action, fast | Medium-High |
| Adjustable Wire Strippers | Versatility, varying wire sizes | Adjustable setting for different gauges | Medium |
4. How to Choose the Right Wire Stripper for Your Project?
Choosing the right wire stripper involves several factors, such as the type of wire, the gauge size, and the specific task at hand. You might be wondering, “How do I know which one to choose?” The key lies in understanding your project needs. If you’re working with thin wires or delicate electronics, a manual wire stripper will give you more control. For thicker cables or bulk work, an automatic stripper can save you time and effort.
Another factor to consider is the ergonomics of the tool. A comfortable grip can make a big difference during extended use, so look for strippers with padded handles or spring-loaded mechanisms. Make sure the tool feels right in your hand and offers enough control for the work you need to do.
Table: Factors to Consider When Choosing a Wire Stripper
| Factor | Considerations |
|---|---|
| Wire Type | Solid or stranded wires require different settings |
| Gauge Size | Ensure the stripper can accommodate your wire’s gauge |
| Tool Comfort | Ergonomic handles help during extended use |
| Project Scope | Manual for precision, automatic for bulk work |
5. What Safety Precautions Should You Take When Using a Wire Stripper?
Wire stripping can be dangerous if not done correctly. But here’s the kicker: with the right precautions, you can avoid accidents and ensure a smooth, efficient process. The most important safety measure is wearing protective gear. Gloves can help prevent cuts, and goggles are essential to protect your eyes from flying debris. Make sure the wire stripper you’re using is in good condition. A dull blade can cause uneven cuts and increase the risk of injury.
When stripping wire, always hold the wire firmly with one hand and the tool with the other. Ensure you have a secure grip to avoid slipping. Also, work in a well-lit area to make it easier to see what you’re doing. Taking these precautions will significantly reduce the risk of accidents and improve the overall efficiency of your wire stripping.
Table: Safety Gear for Wire Stripping
| Gear | Purpose |
|---|---|
| Gloves | Protect your hands from cuts and abrasions |
| Goggles | Shield your eyes from flying insulation pieces |
| Proper Footwear | Avoid injuries from dropped tools or wires |
| First Aid Kit | Always have one on hand in case of an emergency |
6. How to Use a Wire Stripper: Step-by-Step Instructions
Now that you know what a wire stripper is, how it works, and what to look for when choosing one, let’s get down to the details. Here’s a simple, step-by-step guide on how to use a wire stripper effectively.
- Choose the right wire stripper: Select a tool based on the wire type and gauge.
- Set the gauge size: Adjust the stripper to match the thickness of the wire.
- Insert the wire: Place the wire inside the stripper, ensuring it’s centered and properly aligned.
- Squeeze the handles: Apply even pressure to strip the insulation without cutting into the wire.
- Inspect the wire: After stripping, check the exposed wire for any damage or irregularities.
Table: Steps for Using a Wire Stripper
| Step | Action |
|---|---|
| Step 1 | Choose the correct wire stripper |
| Step 2 | Set the gauge size |
| Step 3 | Insert the wire |
| Step 4 | Squeeze the handles |
| Step 5 | Inspect the stripped wire |
7. What Are Common Mistakes to Avoid When Using a Wire Stripper?
Even experienced professionals can make mistakes when using a wire stripper. Let’s talk about some of the most common mistakes and how to avoid them. First, one mistake is over-stripping the wire. When you strip too much insulation, you expose the wire more than necessary, which can lead to damage or even short-circuiting when the wire is connected to a power source. This is a big problem, especially when working with electrical systems.
Another common mistake is using the wrong gauge setting. If the stripper’s gauge setting is too small or too large for the wire, you can either damage the wire or fail to remove all the insulation. This could lead to poor connections or even wire failures down the line.
Rushing the process is another mistake many make. Taking your time ensures that you strip the wire properly without causing any damage. What’s the real story? Working quickly might save time in the moment, but it could result in wasted materials or potential safety hazards.
To avoid these issues, it’s important to always check your gauge setting, carefully measure the amount of insulation you want to remove, and never rush through the task. Paying attention to detail can save you time and frustration in the long run.
Table: Common Mistakes with Wire Strippers
| Mistake | Description | How to Avoid It |
|---|---|---|
| Over-stripping the wire | Exposing too much wire by removing too much insulation | Only remove the necessary amount of insulation |
| Using the wrong gauge | Stripping with a gauge that’s too big or small for the wire | Set the stripper to the correct gauge |
| Rushing the process | Speeding through the task and making careless errors | Take your time and be precise |
8. How to Maintain and Care for Your Wire Stripper?
Taking care of your wire stripper ensures it will last for years and maintain optimal performance. Regular maintenance isn’t just about cleaning the tool; it’s about ensuring that the blade stays sharp and that the mechanism remains functional. First things first, clean your tool after every use. Wipe off any dirt, wire shavings, or insulation that may have built up during the stripping process. If the blade gets too dirty, it can become less effective over time.
What’s the kicker? If the blade becomes dull, your wire stripper won’t function properly. To sharpen it, you can use a sharpening stone or a file to gently file down the blade. Don’t try to sharpen it too aggressively, as this can damage the tool.
You’ll also want to lubricate the moving parts of the tool, especially if you’re using an automatic stripper. Lubrication helps keep the tool working smoothly and prevents it from sticking or becoming difficult to operate. Keep the spring mechanism clean and ensure it’s functioning properly.
Finally, store your wire stripper in a safe place. Keep it in a tool box or drawer to avoid exposure to moisture or corrosive materials, which can damage the metal parts. Taking these simple steps will ensure your wire stripper lasts and performs its best for years to come.
Table: Wire Stripper Maintenance Checklist
| Maintenance Task | Purpose | How to Do It |
|---|---|---|
| Cleaning | Removes dirt and wire shavings | Wipe with a damp cloth after each use |
| Sharpening the Blade | Ensures clean cuts | Use a sharpening stone or fine file |
| Lubricating Moving Parts | Prevents sticking and ensures smooth action | Apply light machine oil to moving parts |
| Proper Storage | Prevents rust and damage | Store in a dry, safe place |
9. How Do Different Types of Wires Affect the Stripping Process?
Different wire types require different approaches when it comes to stripping. For example, solid wire is much easier to strip than stranded wire, which is composed of many small wires twisted together. The added complexity of stranded wire means you have to be more careful to avoid damaging the individual strands.
Another factor that influences wire stripping is the insulation type. Wires with thicker insulation require more force to strip. If you use a wire stripper that doesn’t have an adjustable setting or one that’s not built for thicker insulation, you may have trouble getting through it.
What’s the real story? If you’re working with highly conductive wires, like copper or aluminum, it’s crucial to ensure the wire is not damaged during the stripping process. Even a tiny cut or nick in the wire can drastically reduce its efficiency and cause it to malfunction later.
Choosing the right stripper for the wire you’re working with is vital. If you’re unsure, consider getting a universal stripper that can handle various wire types. This will give you more flexibility, and you won’t have to worry about purchasing multiple tools for different wire types.
Table: Wire Types and Stripping Requirements
| Wire Type | Stripping Requirements | Stripper Type |
|---|---|---|
| Solid Wire | Easy to strip with minimal effort | Manual or automatic stripper |
| Stranded Wire | Requires more care to avoid damaging individual strands | Manual or adjustable stripper |
| Copper Wire | Conducts electricity, sensitive to damage | Fine-tipped wire stripper |
| Aluminum Wire | Softer material, requires precision | Adjustable wire stripper |
10. How to Strip Wire Without a Wire Stripper?
In some situations, you may not have access to a wire stripper. Don’t worry! There are alternative methods to strip wire. The most common method is using a utility knife. Carefully score the insulation with the knife, then peel it off. Be very careful not to cut too deeply into the wire itself.
Another alternative is using scissors. While this isn’t ideal, in a pinch, you can use scissors to cut away the insulation. However, the blades should be sharp, and you need to make sure you don’t nick the wire.
But here’s the kicker: these methods, while effective in emergencies, aren’t as safe or reliable as using a proper wire stripper. If you’re working with critical wires or in an environment where precision is key, it’s best to use the right tool for the job.
Table: Alternatives to Using a Wire Stripper
| Method | Ideal For | Pros | Cons |
|---|---|---|---|
| Utility Knife | Quick, emergency use | Readily available, effective | Can damage the wire if not careful |
| Scissors | Small, flexible wires | Common tool, easy to use | Not recommended for thicker wires |
| Nail Clippers | Very thin wires | Convenient in a pinch | Not precise, can damage the wire |
11. How Can You Improve Your Wire Stripping Skills?
Stripping wire might seem like a simple task, but with practice, you can become much more efficient and accurate. What’s the secret? The key is to practice with different types of wire, materials, and insulation. The more experience you gain, the faster and more precise you’ll become.
To improve, try practicing on various gauges and materials. Start with something easy, like a single strand of copper wire, and work your way up to more complicated tasks. Pay attention to the feel of the tool as you strip the wire. You should be able to tell when you’re applying the right amount of pressure.
Another way to improve is by using a wire stripping guide. Many wire strippers come with guides that help you achieve the correct cut every time. These guides are great for ensuring you strip the wire evenly, without damaging the metal underneath.
Table: Tips for Improving Your Wire Stripping Skills
| Tip | Description |
|---|---|
| Practice with different wire types | Start with simple wires and move to more complex ones |
| Pay attention to tool feel | Learn the right amount of pressure for clean strips |
| Use a wire stripping guide | Guides ensure precision and consistent results |
12. How to Troubleshoot Common Wire Stripping Problems?
Wire stripping seems straightforward, but there are several common problems that might crop up, especially if you’re a beginner. One of the most common issues is damaging the wire while stripping it. You might accidentally nick the wire with the blade, weakening its structure and potentially causing electrical problems. The solution here is simple: always make sure the wire stripper is set to the correct gauge, and handle the tool with care. If you can feel any resistance or irregularities, stop and check the wire.
Another issue is incomplete insulation removal. Sometimes, the insulation doesn’t come off cleanly, leaving a small section still attached to the wire. This can be frustrating, but don’t worry. If this happens, reposition the wire inside the stripper and try again, applying steady pressure to make sure the insulation is fully removed.
Sometimes, the stripper’s blades get dull over time, especially if you’re working with thicker wires or materials. Dull blades cause the tool to lose its effectiveness, leading to poor results. What’s the kicker? Keep an eye on the tool’s condition and regularly sharpen or replace the blades to maintain optimal performance.
Table: Troubleshooting Common Wire Stripping Problems
| Problem | Cause | Solution |
|---|---|---|
| Damaged wire | Incorrect gauge setting or improper handling | Use the right gauge and handle the tool gently |
| Incomplete insulation removal | Blades aren’t cutting completely | Reposition the wire and try again |
| Dull blades | Overuse of the tool or working with tough materials | Regularly sharpen or replace the blades |
13. How to Strip Wire for Specific Projects (e.g., Electrical Wiring, DIY Projects, etc.)?
The method for stripping wire changes depending on the specific project you’re working on. Let’s explore a few examples of how to strip wire for different types of work. When dealing with electrical wiring, especially in homes or commercial buildings, precision is crucial. You’ll want to ensure that you don’t strip too much wire, leaving a good amount of wire for making the connections. The best practice here is to strip only a small section of the wire at the end, leaving enough wire exposed to complete the task. You should also be mindful of the voltage rating to ensure the insulation thickness is adequate.
For DIY projects, the approach can vary. If you’re building a circuit or working with low-voltage components, you can use a finer wire stripper to ensure accuracy. But be cautious with very thin wires, as they can be easily damaged. The right stripper will allow you to handle delicate wires without cutting through them.
What’s the real story? When working on a car repair project or other automotive applications, you’ll often deal with thicker wires that need extra care. The insulation on automotive wires is usually tougher, requiring a bit more force to strip. Be sure to adjust your wire stripper’s gauge setting accordingly to prevent damaging the wire.
Table: Stripping Wire for Specific Projects
| Project Type | Wire Type Used | Recommended Wire Stripper |
|---|---|---|
| Electrical Wiring | High-voltage wire | Manual wire stripper with fine blade |
| DIY Projects | Low-voltage components | Adjustable wire stripper with small gauge |
| Automotive Repair | Automotive wire (thicker) | Heavy-duty manual stripper with strong grip |
14. How to Properly Dispose of Stripped Wire and Scrap Materials?
Proper disposal of stripped wire and scrap materials is an important step that many people overlook. What’s the kicker? Improper disposal can lead to environmental harm, especially when dealing with materials like copper or plastic insulation. To ensure you’re disposing of materials responsibly, start by sorting the scrap materials. Separate copper wire from aluminum wire and ensure that the insulation is discarded properly. Many recycling centers accept wire scrap, particularly copper, because it has significant value.
Another key step is recycling. Copper and other metals used in wires are highly recyclable, so make sure to take them to a local recycling facility. Recycling not only helps the environment but also reduces the demand for new materials. Plastic insulation, on the other hand, should be disposed of separately and according to your local waste management guidelines.
If you regularly work with large quantities of wire, consider setting up a scrap collection station at your workspace. This way, you can easily collect wire and insulation materials in separate bins, making it easier to dispose of them responsibly when you’re done with your project.
Table: Proper Disposal of Wire and Scrap Materials
| Material Type | Disposal Method | Recommended Action |
|---|---|---|
| Copper Wire | Recycle at local facility | Separate from other materials and recycle |
| Aluminum Wire | Recycle at local facility | Separate and recycle at designated center |
| Plastic Insulation | Dispose of properly | Follow local waste management guidelines |
15. When Should You Replace Your Wire Stripper?
Wire strippers are durable tools, but like any other tool, they eventually wear out and need to be replaced. You might be wondering, “How do I know when it’s time to replace my wire stripper?” The most obvious sign is if the blades are dull and no longer strip the wire effectively. You can attempt to sharpen the blades, but eventually, they’ll become too worn to use properly.
Another sign that it’s time for a new wire stripper is loss of function. If the handles are cracked, the spring mechanism is broken, or the tool no longer performs well, then it’s time to replace it. Don’t wait for a malfunction to cause you issues on a job site—replace it as soon as you notice any serious damage.
What’s the real story? If you notice the tool becoming less effective, don’t hesitate to invest in a new one. A quality wire stripper can save you time and improve your results. And, don’t forget, regularly maintaining your tool can help prolong its life, but nothing lasts forever.
Table: Signs You Need to Replace Your Wire Stripper
| Sign of Damage | Action to Take | Solution |
|---|---|---|
| Dull blades | Cannot strip wire properly | Sharpen or replace the blades |
| Broken spring mechanism | Tool no longer functions | Replace the tool entirely |
| Cracked handles | Loss of grip or stability | Replace the wire stripper |
FAQ
Q1: What is a wire stripper?
A wire stripper is a tool designed to remove the insulation from electrical wires, making it easier to connect or splice the wires.
Q2: How does a wire stripper work?
A wire stripper uses sharp blades to cut through the wire’s insulation while adjusting the gauge size to avoid damaging the metal conductor inside.
Q3: What type of wire stripper should I use for a specific task?
The type of wire stripper you should use depends on the wire size and your project needs. Manual strippers are best for small tasks, while automatic ones are better for bulk work.
Q4: How can I avoid damaging the wire while stripping it?
Ensure the wire stripper is set to the correct gauge, and apply even pressure while stripping the insulation.
Q5: Can I reuse stripped wire for other projects?
Yes, you can reuse stripped wire as long as it hasn’t been damaged during the stripping process.

